Step 1: Accessing Pending Filings
There are two ways to view your current pending filings:
Option 1: Go to Overview → To-Do List → Pending Filing
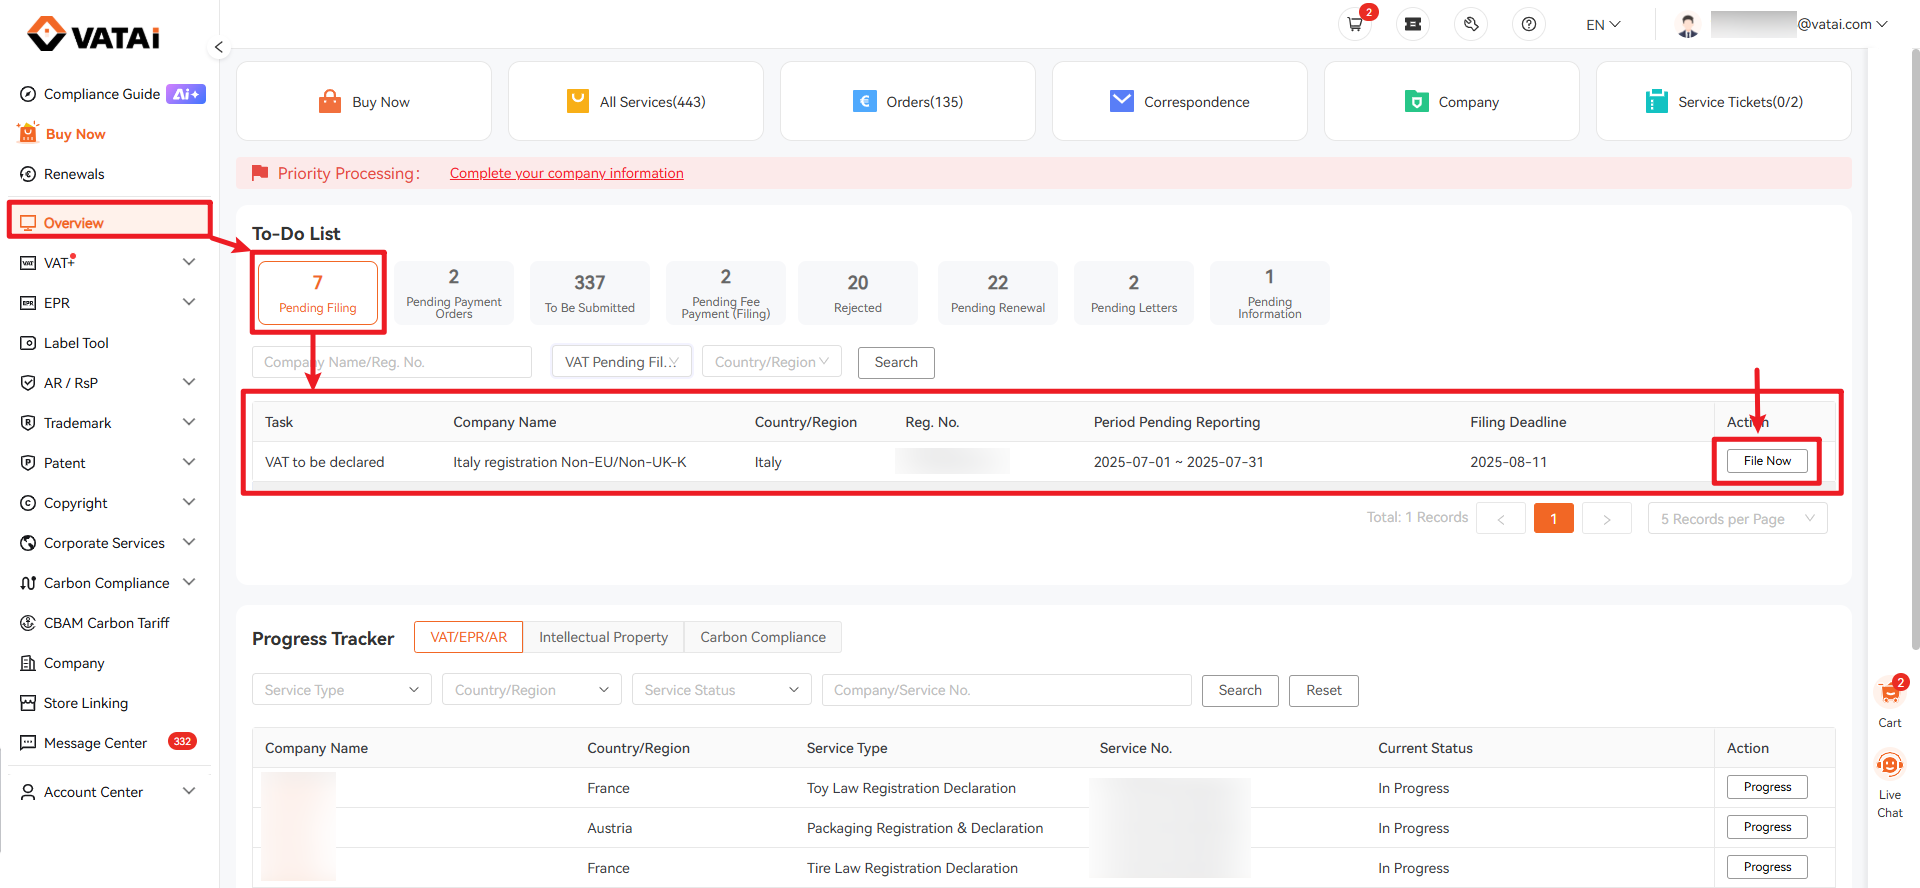
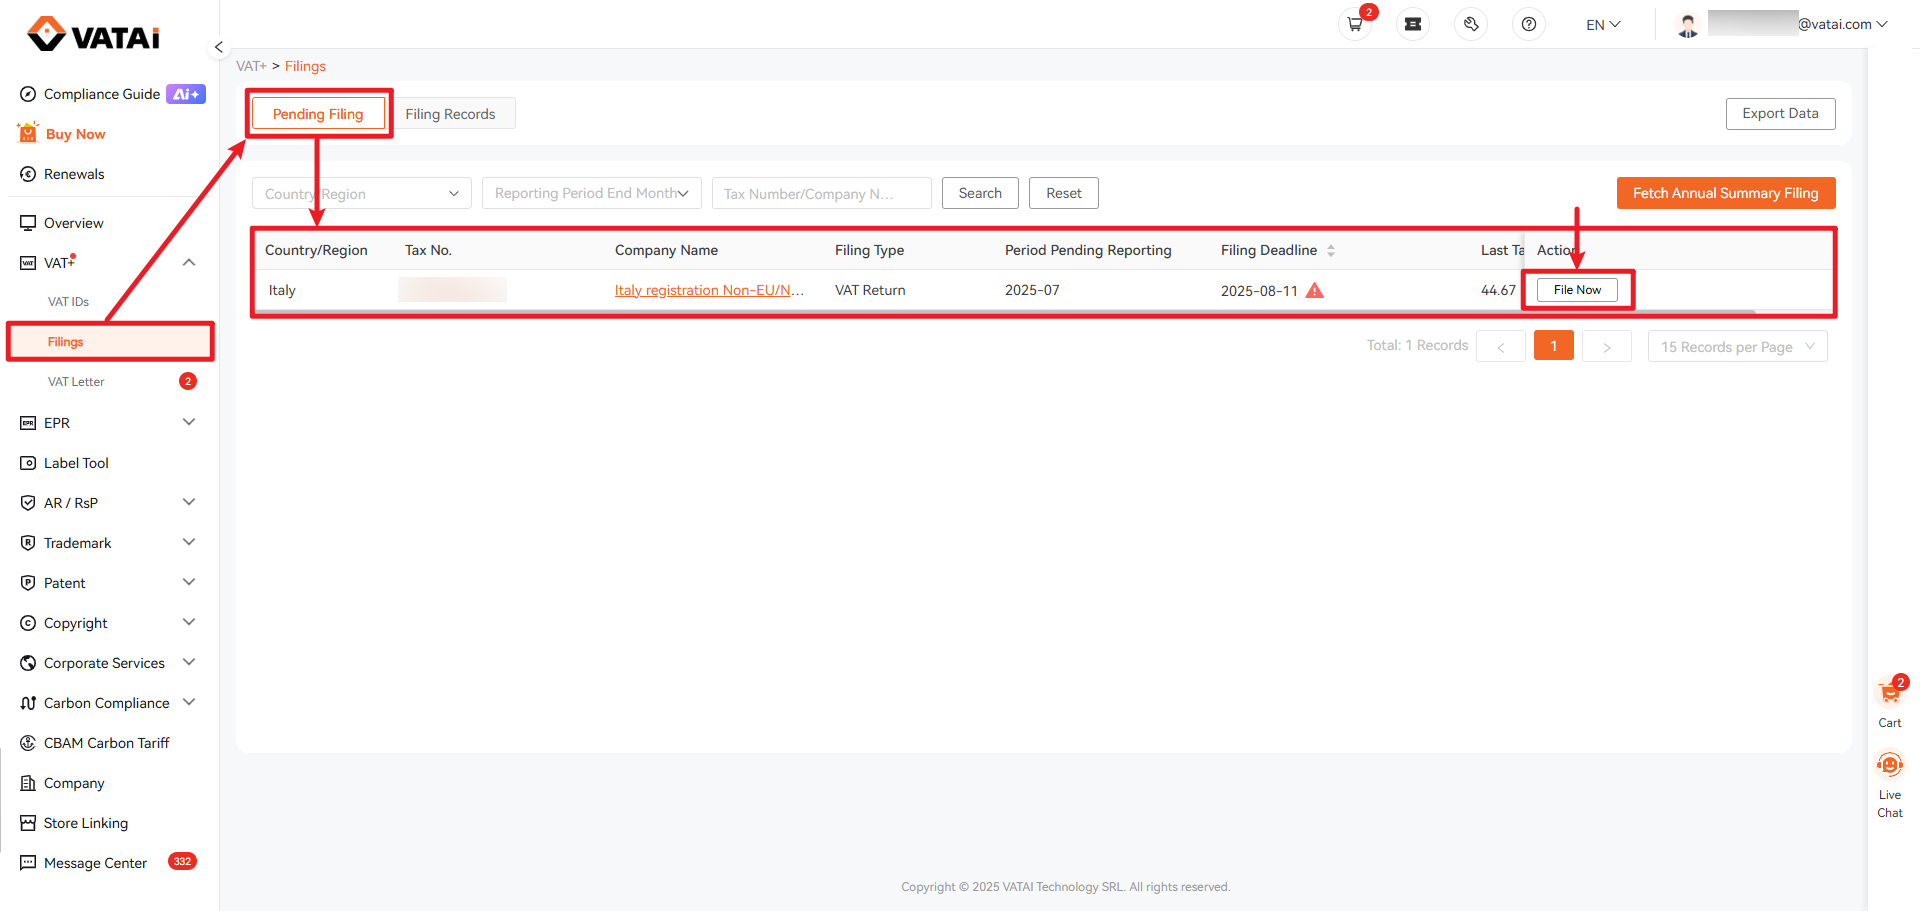
Option 2: Go to VAT+ → Filings → Pending Filing
Step 2: Submitting a Filing
2.1 Click “File now"
This will take you to the filing submission page

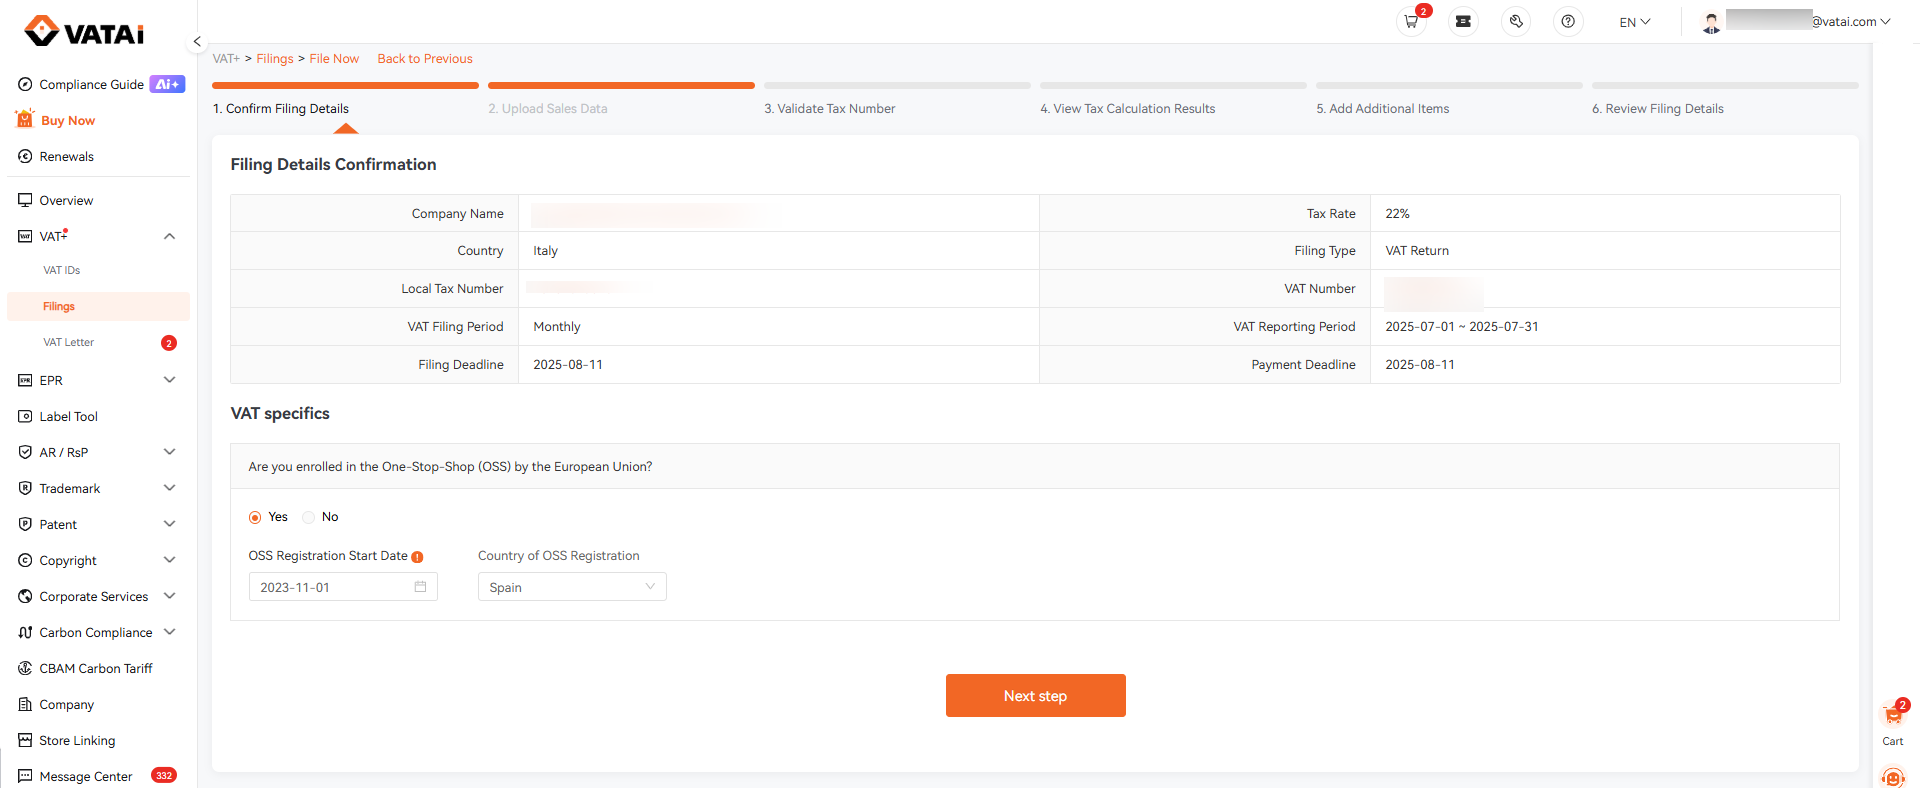
2.2 Review Filing Information
Check your filing details for the current period. If everything is correct, click “Next step.”
⚠️ Important: If you are registered for OSS, please select “YES” and indicate your registration country and date. This is critical for accurate VAT calculation.
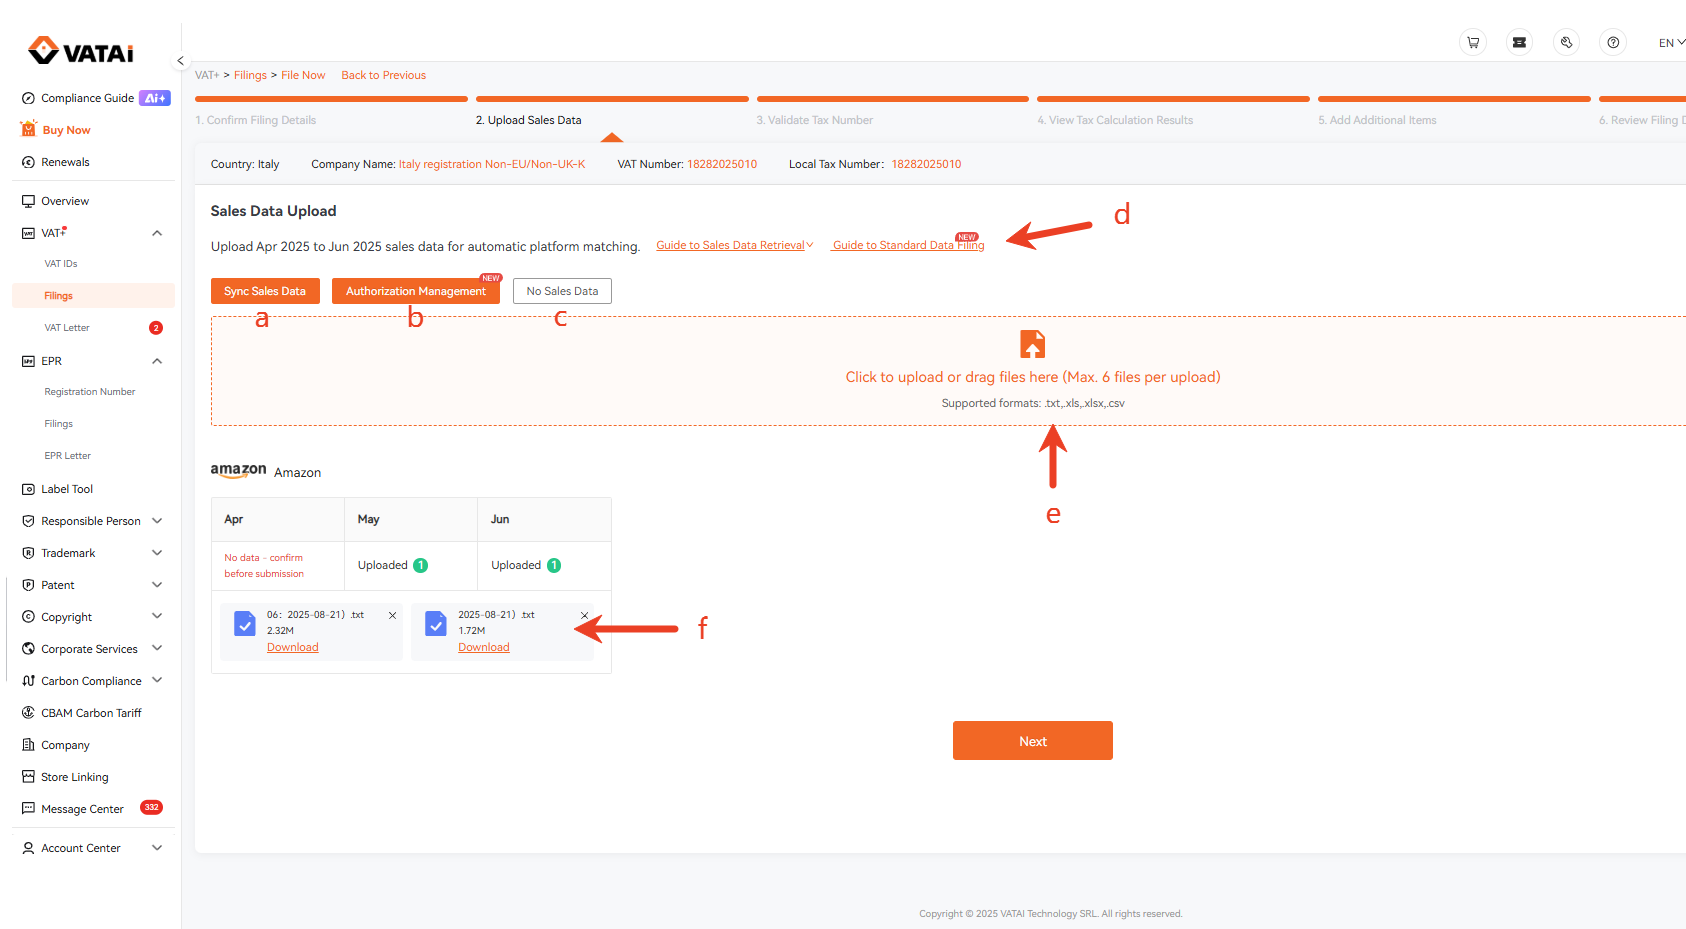
2.3 Upload Your Sales Data
a. Sync data from authorized stores
If your store has already been authorized, the system will regularly fetch your sales data. Click “Sync Sales Data” to automatically pull the data into your filing.
b. Manage store authorizations
Click “Authorization Management” to manage your store connections.
c. No sales this period
If you had no sales during the period, click “No sales data” to submit a zero-sales declaration.
d. Manual upload via template
If your platform is not yet supported for automatic tax calculation, you can use the Standard Sales Data Template. Click “Guide to Standard Data Filing” for detailed instructions.
e. Upload your own report
If you already have a sales report file, simply drag and drop it into the upload area. The system will parse it automatically.
f. Review parsed files
After parsing, your files will appear at the bottom of the page, organized by month. Click “Next” to proceed to tax calculation.
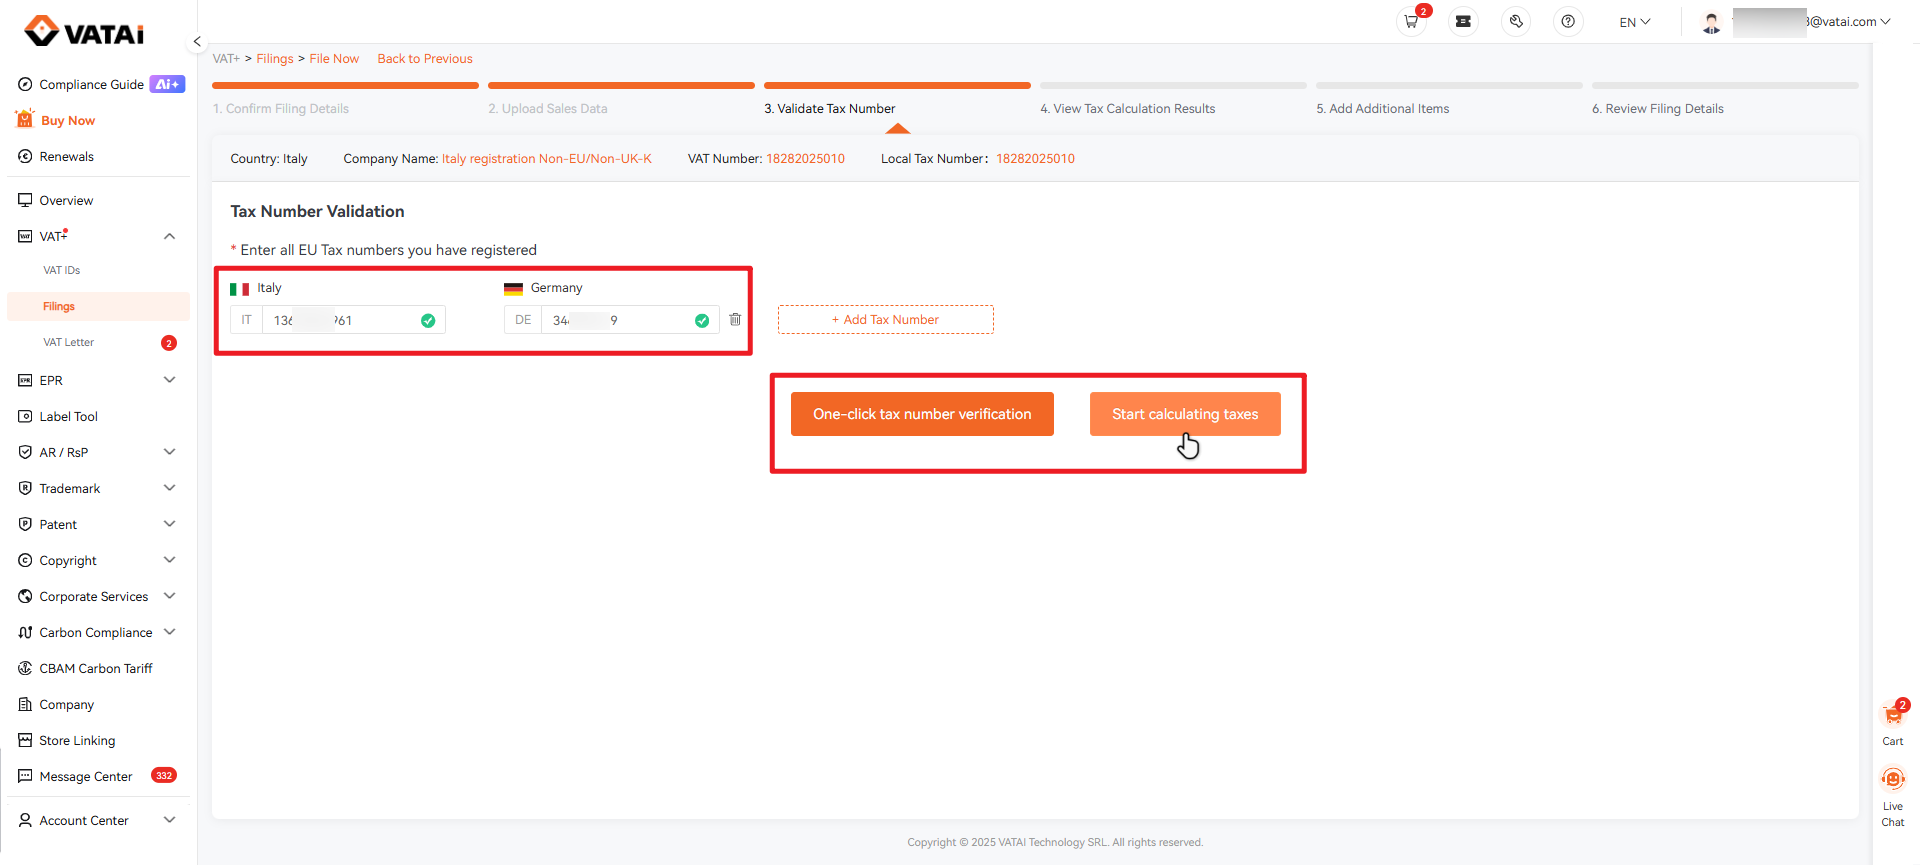
2.4 Verify Your VAT Number(s)
The system will display your existing VAT numbers automatically. If you have additional VAT numbers, click “Add a new VAT” to include them.
Once added, click “One-click tax number verification” to confirm validity, then click “Start calculating taxes.”
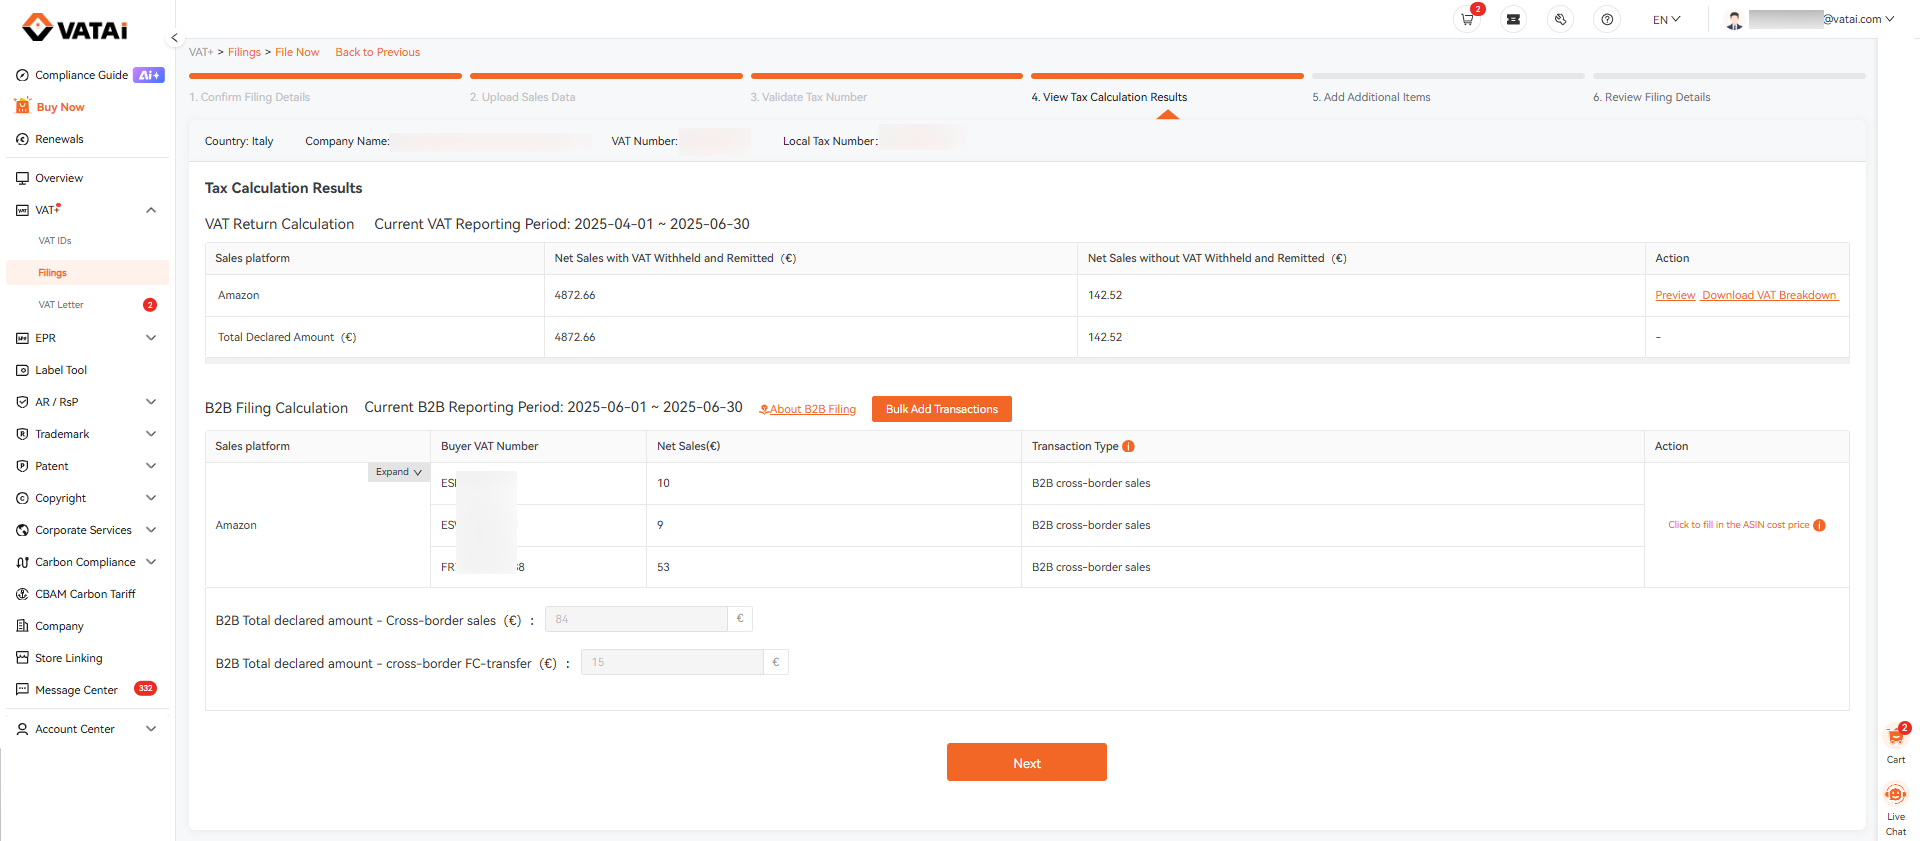
2.5 Confirm Tax Calculation Results
The system will display your tax results by platform. Review carefully, then click “Next step.”
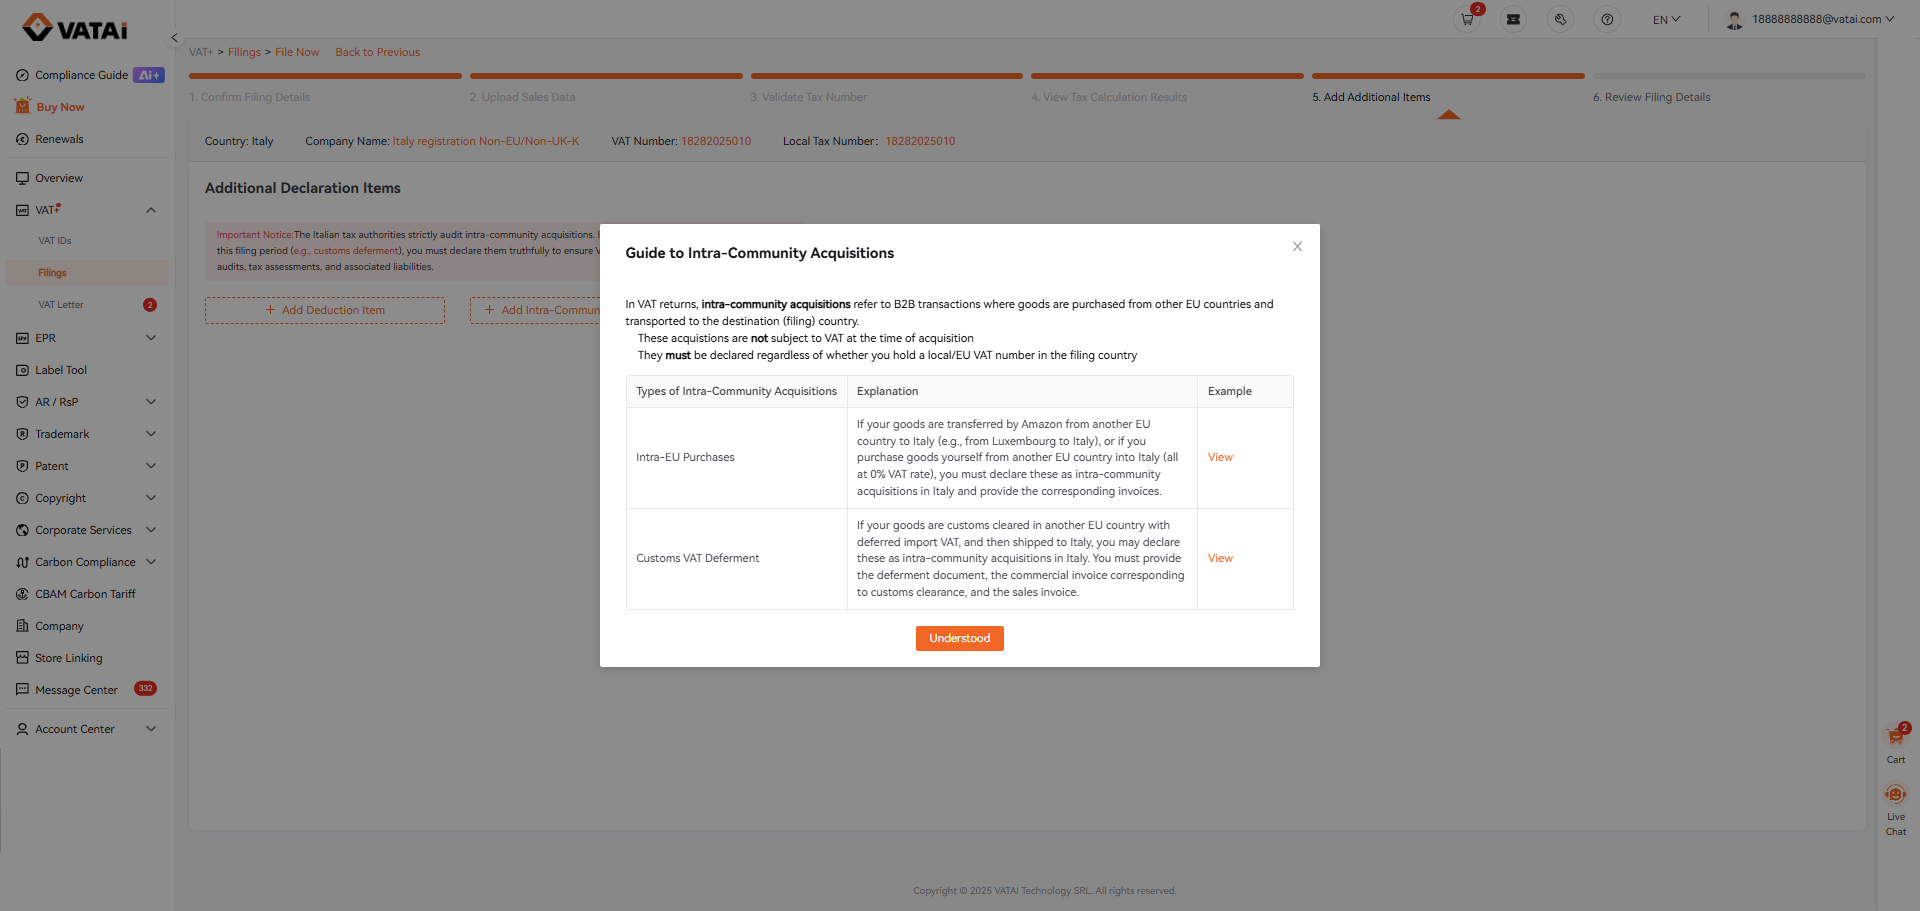
2.6 Add Other Filing Items
If you need to include additional items (e.g., import VAT, purchase invoices), you can add them here.
Note: Available options vary by country. Please refer to the page examples.
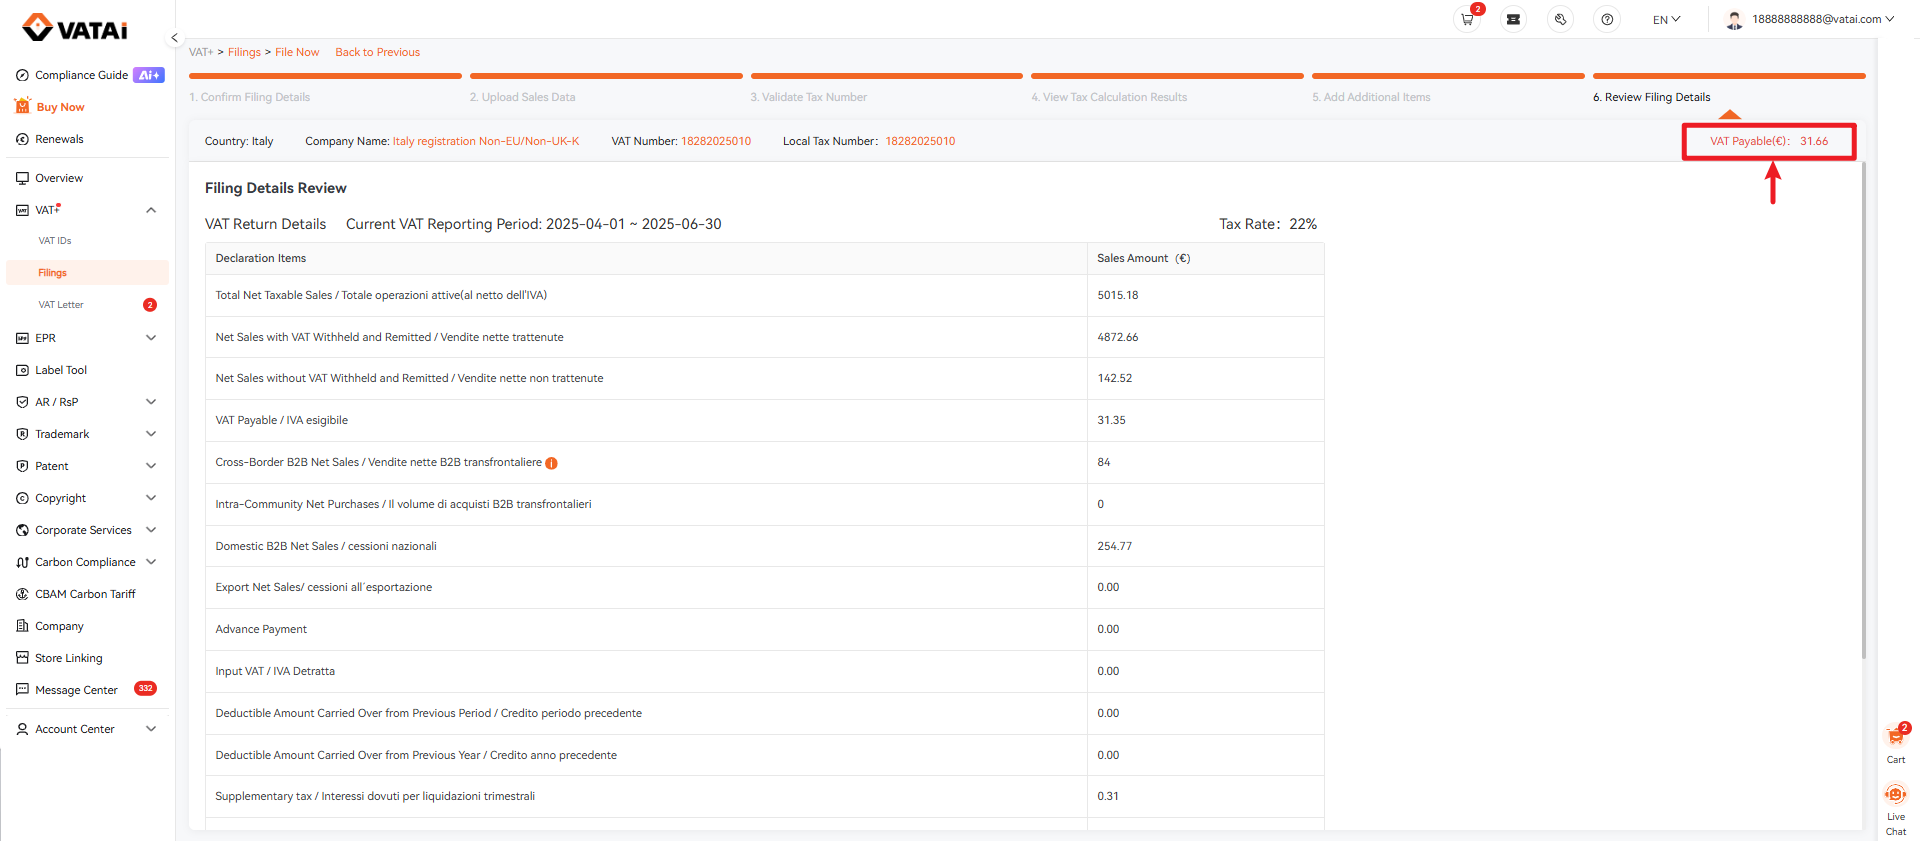
2.7 Review Filing Summary
On this page, you can review the final filing details, including taxable sales, VAT payable, and deductible amounts.
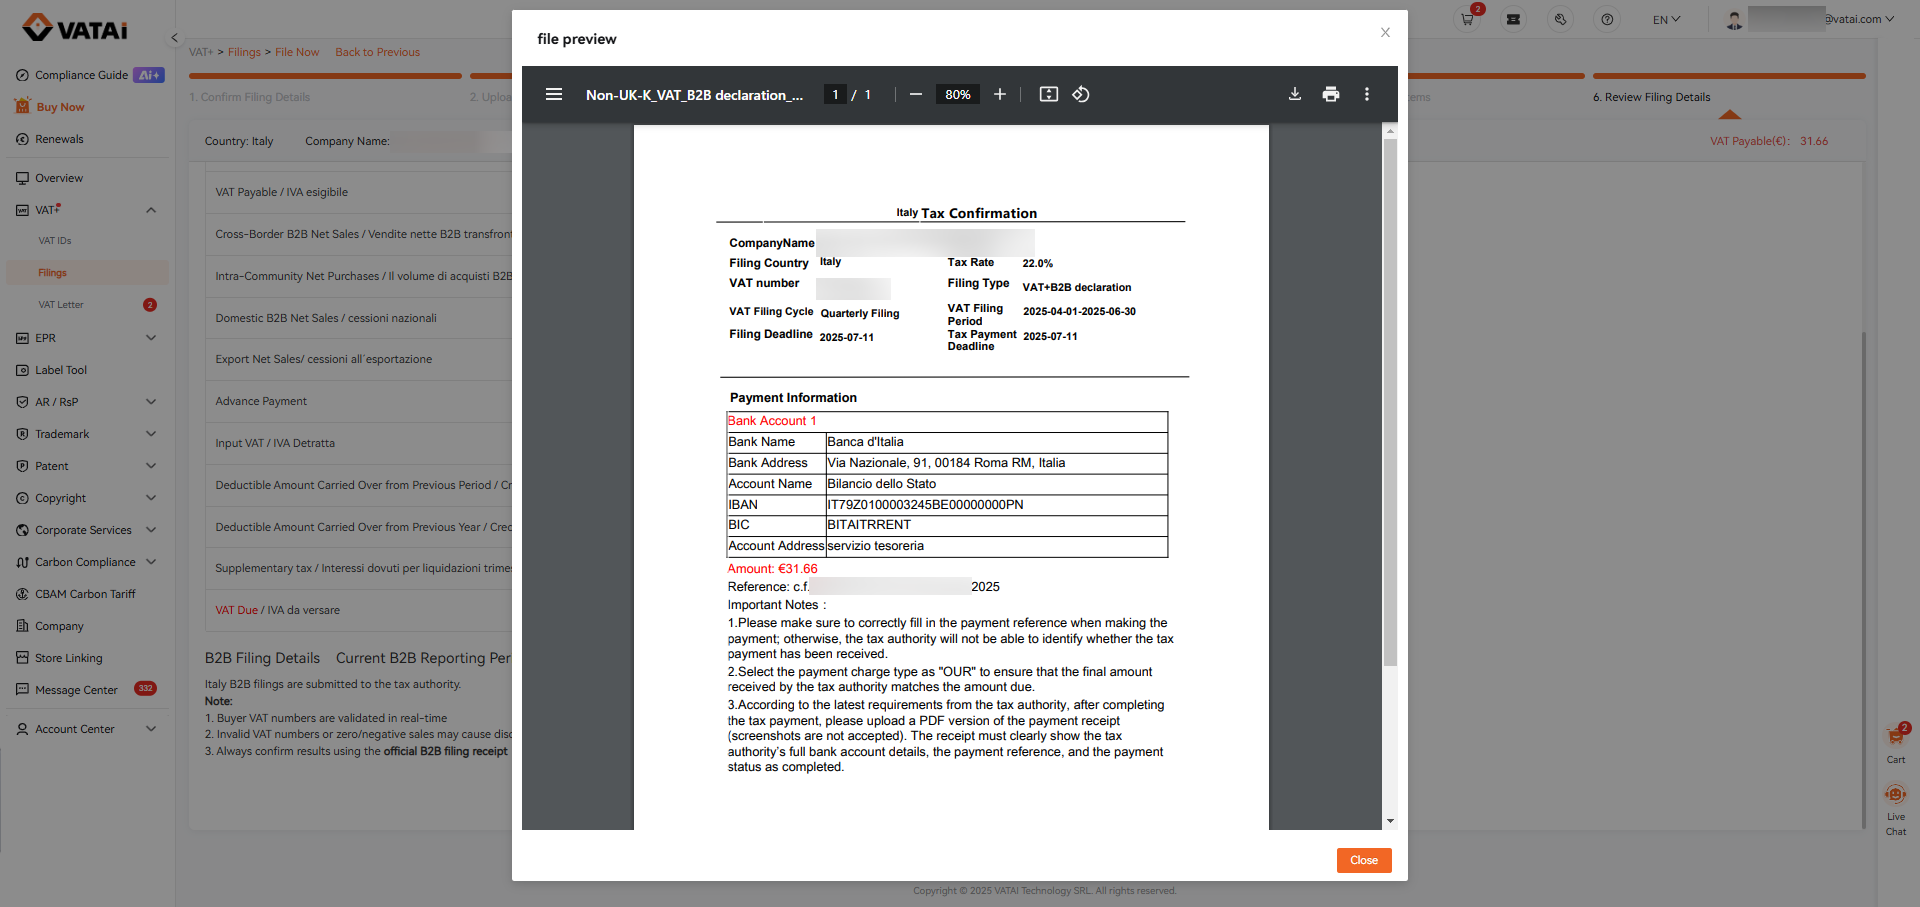
- To view tax payment information, click “Review the tax confirmation letter.”
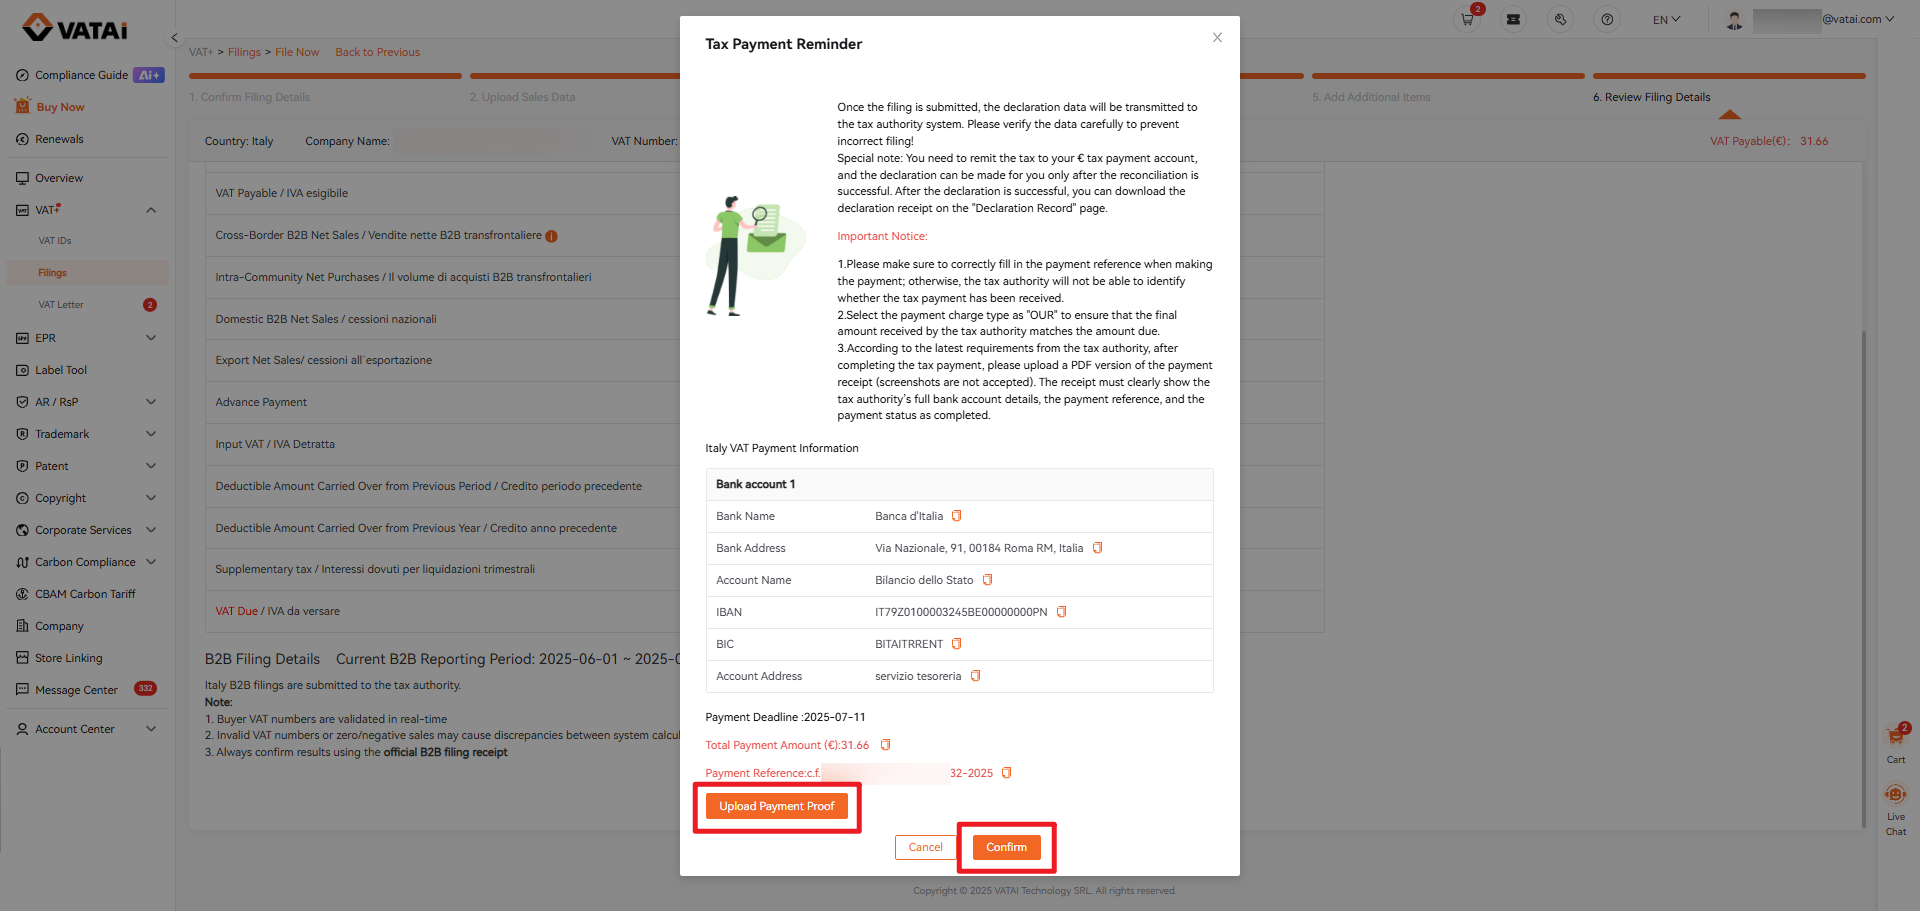
- You can also click “Submit” to view payment details directly in the pop-up window.
- After making the payment, upload your proof of payment and click “Confirm.”
Once our internal process is complete, the data will be transmitted to the tax authority. You can later log in to download the official filing receipt.
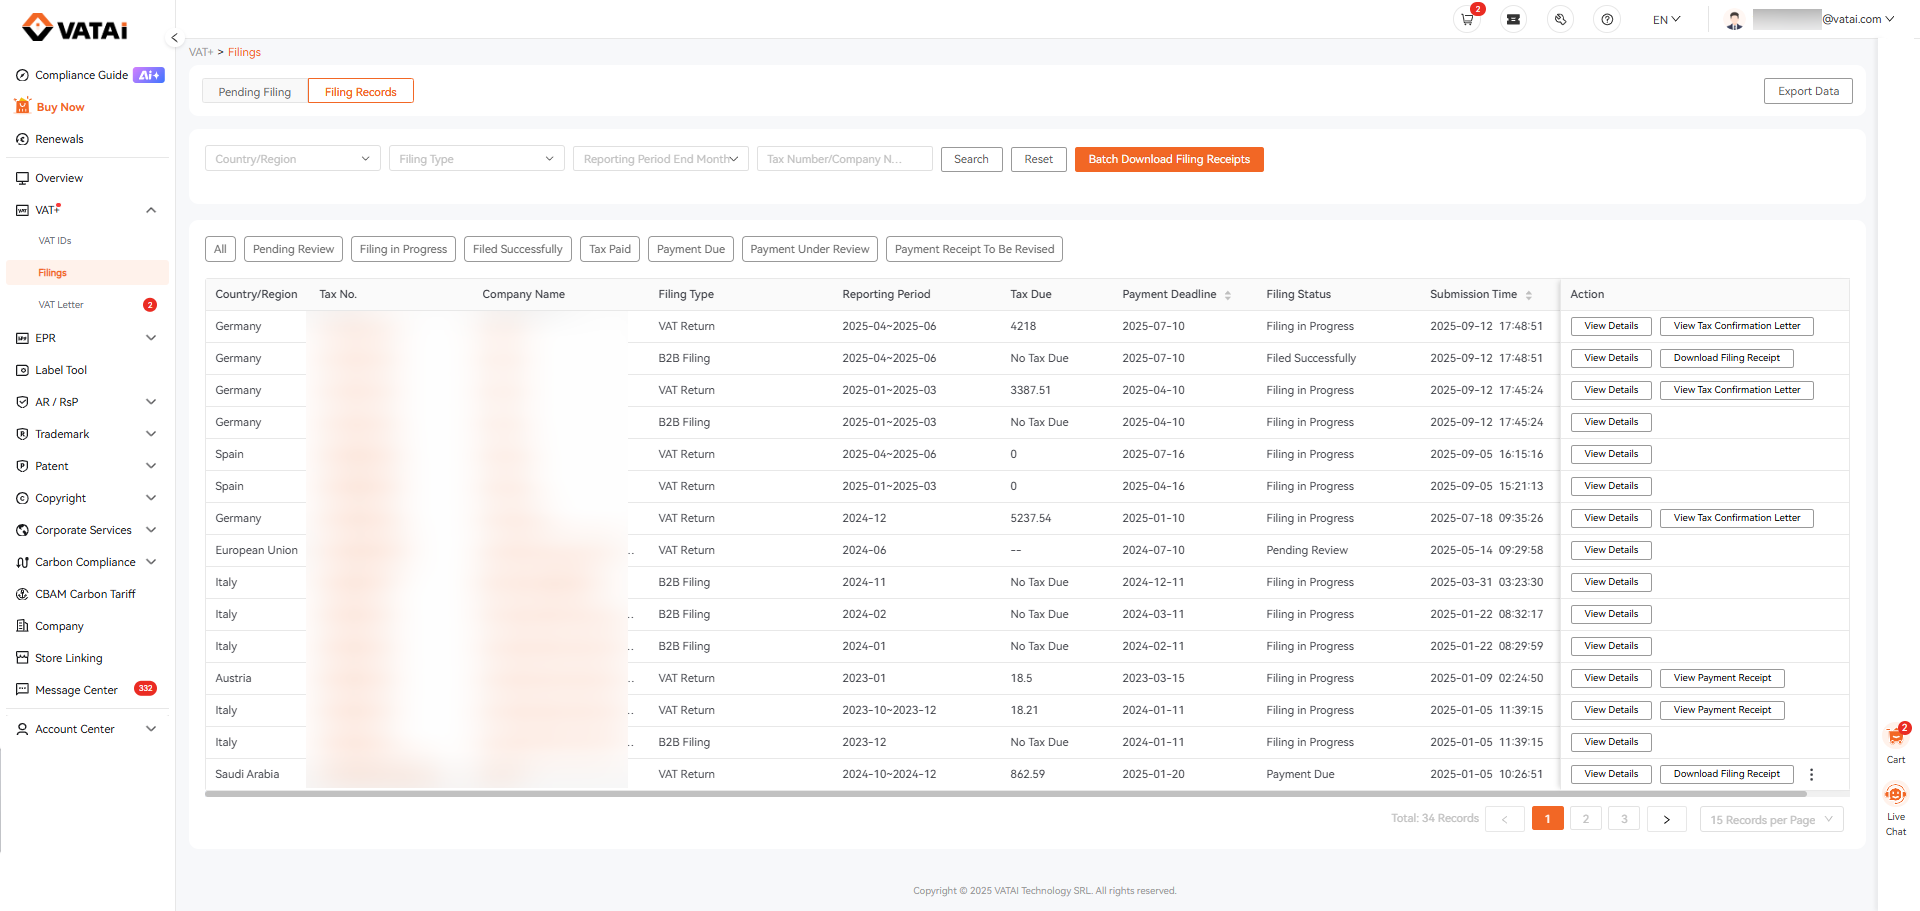
2.8 Viewing Submitted Filings
To review past filings:
Go to VAT+ → Filings → Filing Records.
Here you can:
- View all submitted filing details
- Download tax confirmation letters
Download official filing receipts